

I feel so honored to be featured on Handmade Philly today:
http://handmadephilly.wordpress.com/2010/03/29/interview-with-gigglepotamus/
Filed under: craftiness | Tagged: gigglepotamus, handmade philly, interview | Leave a comment »

I feel so honored to be featured on Handmade Philly today:
http://handmadephilly.wordpress.com/2010/03/29/interview-with-gigglepotamus/
Filed under: craftiness | Tagged: gigglepotamus, handmade philly, interview | Leave a comment »
(This is a repost of what I wrote for Handmade Philly this week)

It’s official- spring has sprung, and egg dying season is upon us. Growing up, we always purchased food coloring kits, but if you’d like to try something a little more traditional, then please read on. Natural dyes do take a little longer than their chemical counterparts, but I think the results are worth it.
I like the idea that dying eggs can be safe for the environment, both by using natural elements as well as less packaging, while also paying homage to how I imagine our ancestors must have done it. For this tutorial, I have also included a stencil technique if you’d like to add an additional layer of interest to your eggs.
Let’s start with the beets, which will turn your eggs anywhere from pale pink to deep red-violet, depending on how long you leave them in the dye bath. I boiled two cups of chopped beets with two cups of water, 1-2 tablespoons of white vinegar, and 1 T of salt . I am told the eggs come out better when the dye mixture is hot, and since you have to hard boil them anyway, you can just put them all into the pot together & boil for 15 minutes. After that, remove from heat, and leave the eggs in the mixture until desired shade is achieved. I left mine in for several hours, and this is what I got:

Since the natural dyes leave the eggs somewhat dull, you can polish them when they’re dry with a little bit of oil. As you can see from the photo, the oil polish (I used canola) also deepens the color quite a bit. For the egg on the left, I tried tying rubber bands around it to give it more texture. For the one on the right, I used wild strawberry leaves as a stencil.
To achieve the stencilling effect, gather whatever materials you think would make an interesting pattern on your egg. I went out in my backyard and picked the following:

Next, you will need some old nylon stockings. Cut off the feet so you have a little bag big enough for the egg with room to tie it off. Place the egg inside, with whatever material you are using for a stencil. I tried to flatten the leaves out against the egg surface as best as possible, but it is a little tricky, and I liked the randomness of it anyway. Then, tie off the open end of your stockings as tightly as possible with either a rubber band or a knot, and you should have something that looks like this:

From there, you just put it in your dye bath until you’re ready to remove it. Here are how some of my other eggs turned out:

Boil one head of chopped cabbage for about 30 minutes. Strain the liquid, and add ¼ cup white vinegar and ¼ cup of salt and your eggs so they are covered. Not only will the eggs turn a beautiful shade of blue, but you can see the difference between leaving them in the dye bath for several hours vs. about an hour (bottom eggs).

For the turmeric eggs, I boiled one cup of water with 1 T. turmeric, 1 T. white vinegar, and 1 T. salt. I transferred the mixture to dye cups & immersed my eggs for only about an hour.

2 cups yellow onion skins boiled with 2 cups water, 1T. vinegar, & 1 T. salt. I wrapped the one on the right in onion skins with nylon over top, and it came out with a really cool marbled texture.
I haven’t personally tried these, but here are some other natural elements that you can experiment with. Just remember to add the vinegar so the dye sticks to the eggs:
Blue:
Filed under: craftiness, food, sharing | Tagged: crafts, easter, gigglepotamus, natural egg dying, spring | 5 Comments »
Filed under: craftiness | Tagged: chalfont, craft show, creativity, gifts, gigglepotamus, shopping, spring | 4 Comments »
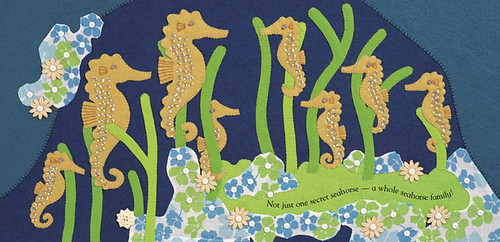
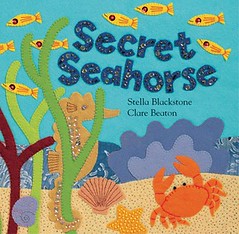 I thought I’d share a book that was given to the kids by their grandmother some time ago, and I’ve since fallen in love with it. The Secret Seahorse, by Stella Blackstone. It’s a cute little story that has an added element of a hidden seahorse in each full-page spread. Even though the boys have read it enough times that the little seahorse’s secret is out, they don’t grow tired of it. Neither do I.
More than the story, however, I find that the pictures are what keep me coming back time and time again. As a child, I wasn’t much for reading, but I loved getting lost in intricate illustrations of sea life, forest life, anything nature-oriented. I guess not much has changed!
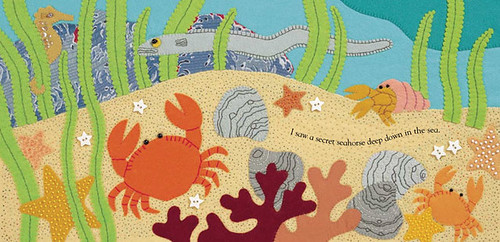
All of the illustrations are done in felt and vintage fabrics, buttons, trims, and stitched by hand. The bright colors, the rich layouts, and the intricate detail are just fascinating to me. I guess being an artist who also fell in love with fabric, this is something that I find wildly inspiring.
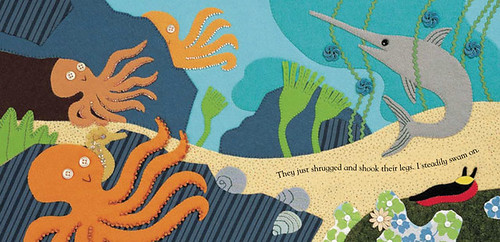
The artist, Clare Beaton, clearly has some skills. Not only is it obvious the woman can draw, but her stitching is impeccable. Her work, to me, is the perfect marriage of the two mediums.
If you check it out, I hope you find it as charming as I do. I’m curious… what’s inspiring you lately (doesn’t have to be a book)?
Filed under: inspiration | Tagged: art, barefoot books, books, children's literature, collage, embroidery, fabric, secret seahorse | 4 Comments »
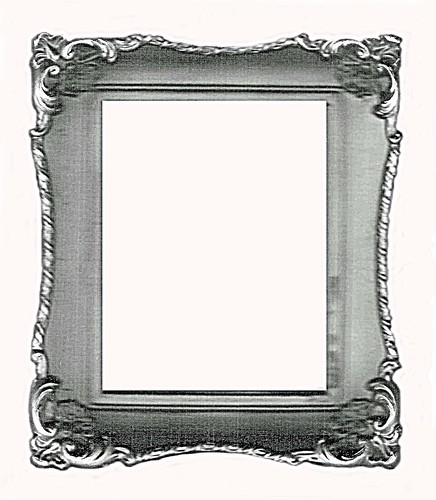
Max came home from school the other week with a cute little project that I thought I would adapt & share. It’s easy and versatile- I basically just scanned a fancy picture frame that can be printed out & filled in by little (or big) budding Picasso’s and Kahlo’s:
Or, if you prefer, some oval fussiness:
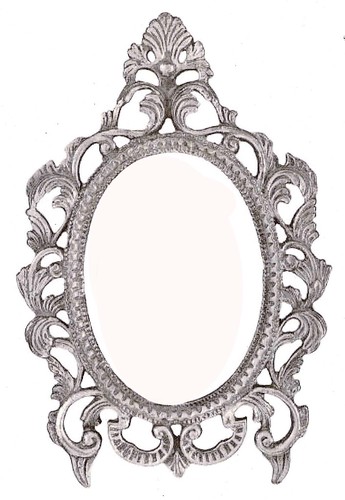
You can either print them out onto white paper, then let your little (or big) person draw their masterpiece within the frame, or, go a little further and print it on a color paper of your choice, cut out the middle, & frame around an existing drawing.
Just click on the above images to open them in a new window & print- I tried to get them the right size for printing, but you may have to resize beforehand- I would recommend doing a “print preview” to see if it needs adjusting, which you should be able to do from the preview screen. Let me know if you need help, & I’ll give it my best college try. Feel free to make several copies to give art projects a little added flair. This is Max’s self-portrait:

I was also thinking these frames might be cute for other paper projects, such as collages, silhouettes, etc. Have fun.
*** Update ***
You’ll have to resize the images from your print preview screen to at least 150%, but no larger than 167% for the rectangle, or 187% for the oval to get the most out of your 8½” x 11″ sheet of paper. Sorry for the confusion!
Filed under: craftiness | Tagged: art, crafts, drawing, kids, portrait, projects, sharing | 1 Comment »
snownami · cold · baking · sewing · sinus infection · pediatrician · no school · homemade valentines · cabin fever · uno · jello jigglers · spaghetti · snow · shovelling · back aches · mahna, mahna · giant cookies…mmmm · pj’s · couch cushion fort · netflix · paul blart, mall cop · legos · laptop · work from home · baby shower · lasagne · candy hearts · tylenol · holy cow, more snow! · jackson’s first steps · bruises · bumped heads · hide and seek · bunco · glitter glue · baby quilt · panda bear pants · cuddles · down comforter · sick kitty · the monster at the end of this book · target · score! alton brown tickets! · superbowl · go saints · snow puddles · inside voice, please! · don’t hit your brother · wipe your feet · the “incident” with the hair clippers · stop hitting your brother · cordon bleu · yuck! I’m not eating that! · wyatt, don’t touch the computer · bologna · IF YOU HIT YOUR BROTHER ONE MORE TIME I’M GOING TO EXILE YOU TO ANTARTICA!!!
Filed under: on the homefront | Tagged: gigglepotamus, week, words | 3 Comments »
Like most of those on the NE Corridor, we are in the midst of snownami 2010, which equates to very excited little boys bouncing off the walls at 6 o’clock in the morning. Good thing I’m a morning person!Anyway, in addition to the digging out and snow play that will be happening, one of my favorite things to do on a cold, blustery, wet, or otherwise nasty day outside is to bake. It’s something that the kids enjoy doing with me, and, * BONUS *, you’re left with something yummy when all’s said & done. Since I volunteered to bring something in for Wyatt’s pre-school Valentine’s party tomorrow, I was already prepared for some time in the kitchen.
When Jackson turned one last month, his birthday fell on a Wednesday. To make it easier on everyone, we decided to have a brunch on the Sunday before to celebrate, complete with cake, ice cream, singing, etc. That left us with the question of what to do on his actual birthday. I didn’t want to do a whole other cake, but I also wanted to celebrate in some small way, too. At some point I thought it would be fun to try making one of those giant cookies that you get at the mall. It couldn’t be that difficult, right? And my favorite go-to website for all things recipe-related, All Recipes, just happened to deliver on my search request of “giant cookie”.
So, check out the link for the recipe, I won’t bother to re-post it here. Be sure to check out the reviews for alternate ideas/tips. I did take one person’s suggestion of baking it in a cake pan to achieve perfect roundness and even baking, but this does make it turn out more like a bar cookie than, well, a cookie-cookie. Today, we are going to try out a heart-shaped variation, with my cool new heart-shaped silicon bake pan alá Targét. I’ll try to post pictures when we’re done. For now, here’s the Jackson version:

I have to say, it was super easy, and SO delicious! I used a recipe I had on hand to make the icing, and pulled out my Wilton pastry tips, but honestly, store-bought frosting works just as well, if not better. I tinted mine with some food coloring & piped it through a freezer bag with the pastry tip on the end.
One more thing: you don’t need the icing, or an event for that matter, to enjoy these cookies! If anyone tries them, I’d love to hear how they turn out.
******** Updated 2/14/10 ******* Here is our Valentine’s cookie:

We used candy hearts and “glued” them on with icing globs. Too bad Wyatt’s party was cancelled due to the snow storm…. it totally sucked that we had to eat it ourselves…
Filed under: food | Tagged: activities, baking, dessert, food, giant cookie, kids | 4 Comments »
Don’t let the title fool you, this project is for us old folks, too. It’s just so easy that I labelled it as a kids’ project. For some reason, this year, I’ve had Valentine’s Day on the brain much more so than in the past. I guess that’s why I managed to get this little tutorial put together in time to actually use it. Honestly, it’s a cute project that has many uses, not just Valentine’s Day, so go ahead and let your imagination run wild.
First, this is what you’ll need:

Step 1:
THIS IS VERY IMPORTANT- if you are doing this with smaller children, and would like to get started in a timely manner & not go completely INSANE, then I would suggest you assemble all of your materials BEFORE you tell the kids what you’re up to. Otherwise, you may just have to hear the phrase, “Please, can we start painting, please, please, PLEASE?????” only about 56,802 times. Additionally, if your kids are too small to cut out shapes or handle a hot iron themselves, then I would also suggest doing the next step before you clue them in, as that, too, can make their waiting more unbearable. Since I did neither of the above, I decided to keep my design pretty simple.
Step 2:
Cut your shapes out of the freezer paper and arrange them on your folded construction paper (if you’re making a folded card) shiney side down. We chose different sized hearts, but you can do just about anything. The nice thing about freezer paper is it can be used like tracing paper, so go nuts with those royalty-free printouts:

Step 3:
** Disclaimer- this seems obvious, but irons are hot! Please use your judgement and closely supervise the little people during this step **
With your iron on a medium heat setting, and your card on an ironing board or other protected surface, press down on each piece of freezer paper for a few seconds, until all pieces are securely adhered.

You should be left with something like this:

(please ignore that hideous dark blotch across this photo- it wasn’t on my card, and I’m too lazy to Photoshop it out right now).
Step 4:
Now you’re ready to paint! Gather your paints and other accoutrements and work some magic all over the surface of the card. Be sure to cover over all of the freezer paper edges with paint to achieve the nicest images. I personally was quite fond of the sponge technique:


Step 5:
Once the paint is dry, it’s time to peel off the freezer paper pieces. This can be tricky, as they tend to disappear a little under all that paint. Once you get the edge started, though, they peel right off:


And you should be left with something like this:

From here, you can either be done, or continue to decorate them with stamps, glitter glue, etc. and of course include your personal message.
Freezer paper is a very versatile material, and it’s something that I use all the time in my sewing projects. The above technique can also be used to paint on t-shirts, pillows, etc. as a “poor man’s silkscreen”. Maybe we’ll cover that project next time. Until then, have fun, & catch ya on the flip side.
Filed under: craftiness | Tagged: cards, crafts, gigglepotamus, handmade, kids, paint, stencil, tutorial, Valentine's Day | 5 Comments »
Hi there. I know, it’s been a while. I should’ve called, but…. I’ve been really busy. I know, lame excuse. If you really meant that much to me, I guess I would’ve prioritized. But, you see, as of late, I seem to have developed a severe aversion to any kind of time management and all things organized. Allow me to present exhibit A- the title of this blog post. Resolutions? Hello, it’s February! Please don’t take it personally, it’s me, not you. Really.
Seriously, I know I have been extremely lackadaisical in my bloggy responsibilities for the past… well, since the third little munchkin burst onto the scene. It’s not that I haven’t wanted to write, more like I haven’t felt much inspiration in that department. It doesn’t come naturally to me, and, to be totally honest, I only started the blog to promote my wee little business. But without much real focus or foresight, I floundered regularly trying to come up with content. Is it about art? Is it about my life? The kids? Is it my side of the Poop and Boogies coin? After Jackson was born, it became clear to me that my time was needed elsewhere until I could figure things out & how to make it all work.
So what did I come up with? Resolutions. Resolutions to be more organized. More focused. More… passionate. I know, artists are supposed to be free, not strapped down by a mundane daily monotony. But what I’ve come to realize is there is freedom in structure. Order is a necessary component in nature, why did I ever think I could somehow be above it?
So here it is. This blog will remain in existence for the purpose of promoting fun, creative outlets that hopefully other people can relate to. And yes, I will use it as a tool to sell my wares. But I will do my best (no guarantees, here) to keep it fun, interesting, and to update regularly with recurring features such as diy crafts, many for the little people (kids, not gnomes… although I like to think they’ll be user-friendly to all, including those who might be vertically challenged, or, “space efficient”, if you want to see the glass as half-full).
For the other stuff, I’ve started a new blog, which I will dedicate to my boys. See, as crafty as I think I am, I am not a scrapbooker, and I have to admit I do feel some anxiety that one day they will look back at the 823,568 or so photos that are stored on our computer’s hard drive and curse us as parents for never organizing their childhood memories into neat and pretty little books, complete with snazzy thought-bubble stickers, et al. So this way, at least I am giving them something to look back through, and probably curse us anyway for telling the whole world embarrassing stories of how they used to dance around in their birthday suits or blow bubbles in the tub.
So there you have it. I’m not making any promises, but I do feel hopeful that by putting it out there, I am basically giving anyone who cares permission to get on my case if I don’t do what I’m intending. Coming next time: a wee little valentine project for the kiddies. Stay tuned.
Filed under: random | 8 Comments »
Today is the day we give thanks. Today is the day we relax, kick back, enjoy family, and stuff ourselves like no other day all year. Traditionally, Thanksgiving was celebrated as a way to give thanks for the bountiful harvest that nature afforded the early settlers.
I do not even attempt to cook Thanksgiving dinner. I usually do my part by bringing some type of side dish and a dessert. This year, I opted for the candied sweet potatoes and this bad boy:

Yes, that is a pie. Nothing says “Happy Thanksgiving” like an apple pie on ‘roids. Eight, that’s right, eight extra large Granny Smith apples were stuffed into this thing, and, while it did settle down a bit after baking, it still carries with it quite a presence:

Ahhhh, let the gluttony begin…
Happy Thanksgiving everyone!
Filed under: food, on the homefront | Tagged: apple pie, food, gluttony, holiday, thanksgiving | 4 Comments »


